Beautiful walk-in closet designs are more than just a dream; they’re the solution to that everyday chaos of overflowing drawers and clothes that mysteriously vanish. Does your current closet feel like a black hole where finding an outfit takes longer than getting dressed itself? Imagine instead stepping into a serene, beautifully organized space, where every item has its place, your favorite pieces are beautifully displayed, and getting ready becomes a moment of calm indulgence. We’re talking about a functional sanctuary that can transform your morning routine, often achievable within a weekend and with a budget that can range from a smart DIY makeover to a professionally designed overhaul. In this article, I’ll guide you through planning your own stunning and practical walk-in closet, covering everything from maximizing space and choosing the right storage solutions to adding those personal touches that make it truly yours. Get ready to discover 40 inspiring ideas that will help you create the walk-in closet you’ve always wanted.
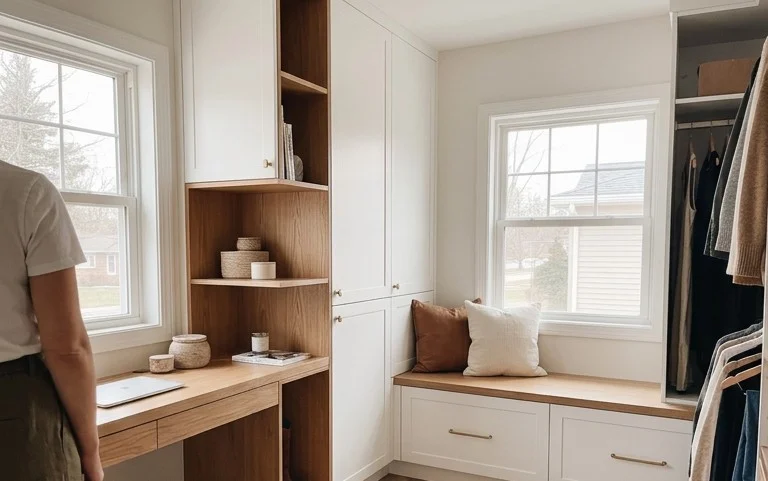
Dreaming of Your Dream Walk-In Closet: A Step-by-Step Guide to Planning Beautifully Organized Spaces
The walk-in closet. It’s more than just a place to stash your clothes; it’s a sanctuary, a personal dressing room, and a powerful tool for keeping your home feeling serene and orderly. For years, I dreamed of having one, picturing a perfectly organized haven where finding an outfit would be a pleasure, not a chore. If you’re nodding along, ready to transform that chaotic spare room or that surprisingly large bedroom corner into a functional and beautiful walk-in closet, you’re in the right place. Let’s break down how to plan your dream space, even if your budget or space is a little… snug.
What You Need and What It Might Cost
Before we dive into the nitty-gritty of planning, let’s talk about the investment. Designing a walk-in closet can range from a simple DIY overhaul to a full custom build-out. For this guide, we’ll focus on a mid-range, semi-customizable approach that offers great value and flexibility.
Essential Components:
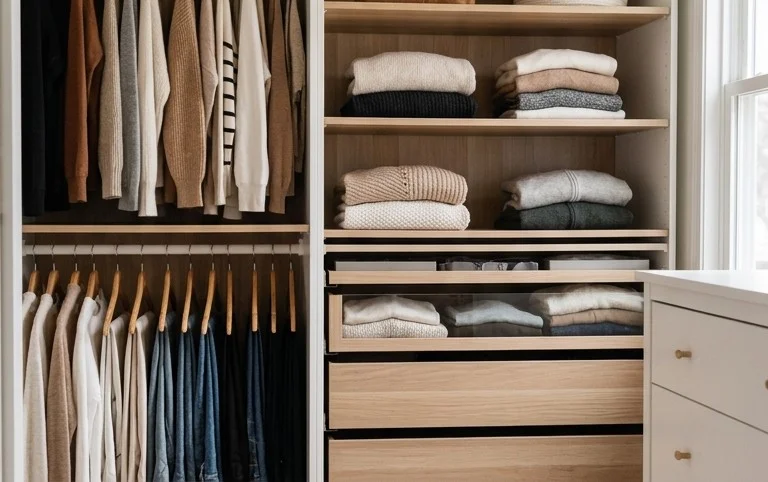
- Shelving and Rods: This is the backbone of your closet. Adjustable systems are fantastic because they grow with your wardrobe. Think units with adjustable shelves and multiple hanging rods.
- Drawers: For folded items like t-shirts, activewear, and undergarments, drawers are essential. Opt for smooth-gliding drawers for a touch of luxury.
- Accessories: This includes things like tie racks, belt hangers, scarf organizers, shoe shelves or cubbies, and perhaps a jewelry drawer.
- Lighting: Good lighting is non-negotiable. Consider overhead lighting and perhaps accent lighting within shelves or drawers.
- Mirror: A full-length mirror is a must-have for any dressing area.
Rough Cost Breakdown (for a moderate-sized closet, approx. 8ft x 6ft):
- Modular Closet System (e.g., IKEA PAX, The Container Store Elfa): This is where you’ll likely spend the most. For a system with multiple shelves, rods, and a few drawers, expect to spend anywhere from $1,500 to $5,000 or more, depending on the brand, materials, and complexity.
- Lighting Fixtures: Simple LED track lighting or a stylish pendant light can cost between $100 to $400.
- Full-Length Mirror: A decent floor-standing or wall-mounted mirror will be in the $100 to $300 range.
- Accessories: This can vary wildly, but budget around $100 to $500 for various organizers.
- Contingency: Always factor in an extra 10-15% for unexpected items or upgrades.
So, for a well-designed, mid-range walk-in closet, you’re looking at a potential investment of roughly $1,800 to $6,200+. Remember, this is a guide, and you can scale up or down significantly based on your needs and chosen materials.
Measuring and Planning: The Foundation of Your Dream Closet
Before you buy a single shelf, grab your measuring tape. This step is crucial and will save you endless headaches (and potentially costly mistakes) down the line.
How to Measure:
- The Room/Space: Measure the width, depth, and height of the entire walk-in closet area. Note any obstructions like windows, doors, vents, or electrical outlets. Measure these precisely. For example, a standard door frame is usually around 32 inches wide, and the door swing needs to be accounted for.
- Wall Space: Break down your measurements by wall. You’ll want to know the usable length of each wall available for your closet system.
- Ceiling Height: Knowing your ceiling height is vital for determining how high you can go with shelving and for choosing appropriate lighting. Standard ceiling heights are often 8 feet, but can be 9 or 10 feet in newer homes or basements.
- Your Wardrobe: Take stock of what you own. How many long dresses, short jackets, folded sweaters, pairs of shoes, and accessories do you have? This will inform how much hanging space, shelving, and drawer space you need.
Planning Your Layout:
Once you have your measurements, it’s time to sketch. Don’t worry about artistic talent; a simple floor plan will do. You can use graph paper or free online room planning tools.
- Zones: Divide your closet into zones. Think about where you’ll hang long items, short items, where folded clothes will go, where shoes will live, and where accessories will be stored.
- Flow: Imagine yourself using the space. What do you reach for most often? Those items should be easily accessible. Less frequently used items can be placed higher up or in less prime real estate.
- Consider the “U” or “L” Shape: Most walk-in closets benefit from a “U” or “L” shaped layout along the walls, leaving the center open for movement. A common layout for an 8ft x 6ft closet might be a 6ft section of shelving and drawers on one wall, and a 5ft section of hanging space on the adjacent wall, leaving a 4ft x 6ft open area in the center.
Your Walk-In Closet Transformation: A Step-by-Step Walkthrough
Now that you’ve planned, let’s get building! This process assumes you’re using a modular system for maximum flexibility.
- Clear and Clean: First things first, empty your entire existing closet space. Give the walls a fresh coat of paint if needed – this is the perfect time! Vacuum or mop the floor thoroughly.
- Assemble Your System: Follow the manufacturer’s instructions precisely to assemble your shelving units, drawer cabinets, and rod supports. This is often the most time-consuming part, so allocate a full weekend if needed. For a system like IKEA PAX, assembly of two large units might take 4-6 hours.
- Install Wall Support (If Applicable): Many modular systems require attaching uprights or cabinets to wall studs for stability. Locate your studs using a stud finder (this is crucial for safety!). For a typical 8ft wall, you might find studs at approximately 16 inches, 32 inches, 48 inches, 64 inches, and 80 inches from one end. Mark these locations. Securely attach the vertical supports or cabinets to the studs according to the system’s instructions. This is generally not a small job and might require drilling into the wall, so be mindful of any restrictions in your home.
- Add Shelves and Rods: Once the main structure is in place, slide in your adjustable shelves and install your hanging rods at the desired heights. Think about the different heights you’ll need for shirts (around 36 inches), dresses (around 60 inches), and folded items.
- Install Drawers and Accessories: Slide in your assembled drawers and attach any specialized organizers like tie racks or shoe shelves.
- Lighting Installation: If you’re adding new lighting, this is where it comes in. This might involve hiring an electrician for hardwiring or simply screwing in battery-operated LED puck lights.
- Hang Your Mirror: Position your full-length mirror. If it’s a floor-standing mirror, ensure it’s stable. If wall-mounted, secure it to studs for maximum safety.
- The Grand Reveal (and Initial Stocking): Step back and admire your work! Now comes the fun part: organizing your clothes.
Adapting for Small Spaces or Rentals
Don’t have a dedicated room? No problem! You can still create a functional and stylish walk-in experience.
Small Space Solutions:
- Go Vertical: Maximize every inch of vertical space with tall, narrow shelving units.
- Slimline Storage: Opt for shallower shelving or drawers to avoid making the space feel cramped.
- Multi-functional Furniture: Consider a bench with built-in storage or an ottoman that can double as a seat and a place to store blankets or less-used shoes.
- Mirrored Doors: If you’re using a wardrobe system, mirrored doors can visually expand the space.
Rental-Friendly Solutions (No Drilling Allowed!):
This is where tension rods, freestanding units, and clever organization hacks come into play.
- Tension Rods: Use tension rods for hanging clothes in an existing closet or even across an empty doorway. You can often fit two rods, one for shirts and one for pants, in a standard closet space, providing about 4-6 feet of hanging space.
- Freestanding Wardrobe Systems: Many open-shelving or wardrobe systems are designed to be freestanding and require no wall attachment. Look for sturdy metal or wood units.
- Over-the-Door Organizers: These are lifesavers for shoes, accessories, or even folded items.
- Command Hooks and Strips: For lighter items or temporary hanging, these adhesive solutions are fantastic. Just be sure to test them in an inconspicuous area first and follow removal instructions carefully.
- Stackable Bins and Drawers: Freestanding plastic or fabric drawer units can be stacked to create modular storage.
Styling Your Sanctuary: Color, Texture, and Placement
A functional closet is great, but a beautiful one elevates your daily routine. Here are some styling notes to make your walk-in a joy to be in.
Color Palette:
- Calming Neutrals: Whites, creams, beiges, and light grays create a serene atmosphere. They make clothes pop and give a sophisticated feel.
- Soft Pastels: Blush pinks, dusty blues, or mint greens can add a touch of personality without overwhelming the space.
- Monochromatic Magic: If you love a specific color, consider using different shades of it for your shelving and accessories for a cohesive look.
Texture Play:
- Natural Materials: Woven baskets for sweaters or accessories add warmth and texture.
- Luxe Linings: Consider lining drawers with a beautiful fabric or wallpaper for a hidden surprise.
- Plush Rug: A small, soft rug in the center of the closet makes it feel like a proper dressing room.
Strategic Placement:
- Prime Real Estate: The most accessible shelves and hanging rods should be for your everyday items.
- Visual Balance: Distribute colors and textures evenly to avoid one area looking too heavy or sparse.
- Matching Hangers: This is a game-changer! Investing in a set of matching slimline hangers (velvet or wood) instantly makes your closet look curated and organized, and they save space too. Aim for at least 30-40 hangers for a decent wardrobe.
- Folded Items: Store folded clothes in drawers or on shelves, neatly stacked. Keep similar items together – all your t-shirts, all your sweaters.
- Shoes: Dedicate shelves or cubbies to shoes. Keep pairs together. If you have statement shoes, consider displaying them on a higher shelf.
- Accessories: Use drawer dividers for jewelry, small hooks for belts and scarves, and perhaps a dedicated hat box.
Keeping It Tidy After Week One: The Long Haul
The initial thrill of a perfectly organized closet can fade. Here’s how to maintain that serenity.
- The “One In, One Out” Rule: For every new item of clothing you bring in, try to let go of something similar. This prevents your wardrobe from expanding uncontrollably.
- Daily Five-Minute Tidy: Before you leave the closet for the day, take two minutes to hang up anything that’s been left out, refold a stray sweater, or put shoes back in their place.
- Weekly Reset: Dedicate 15 minutes each week to a quick sweep. Put away anything that’s ended up on the floor, ensure hangers are facing the same way, and deal with any emerging clutter.
- Seasonal Purge: Twice a year, during your seasonal clothing switch, do a thorough declutter. Donate or sell items you haven’t worn in a year.
- Put Things Back Immediately: The biggest enemy of organization is procrastination. Make a conscious effort to return items to their designated spots as soon as you’re done with them.
Common Mistakes That Make Walk-In Closets Fail
Even with the best intentions, some common pitfalls can derail your dream closet.
- Overbuying Storage: It’s tempting to buy every organizer you see, but you might end up with too much and not enough clothes to fill it, or it just becomes more clutter. Plan your storage based on your actual wardrobe needs.
- Ignoring Lighting: A dark closet is an uninviting closet, and you’re less likely to keep it tidy if you can’t see what you have. Poor lighting can also lead to style mistakes!
- Not Enough Hanging Space: This is a classic. We often underestimate how much hanging space we truly need. Ensure you have a good balance between hanging and shelving.
- Poor Drawer Organization: Drawers can become black holes if not managed. Use drawer dividers to keep socks, underwear, and accessories separated and visible.
- Neglecting Accessibility: Putting frequently used items in hard-to-reach places defeats the purpose of an organized closet. Ensure your everyday essentials are at eye-level or easily reachable.
- Not Planning for Shoes and Accessories: These are often the forgotten items. Dedicated shoe shelves and specific organizers for belts, ties, and jewelry make a huge difference.
- Impulse Buys Without Planning: This is particularly true for rentals. Don’t just buy random organizers; plan your layout and what you need before you shop.
Creating a beautiful and functional walk-in closet is a journey, not a destination. By planning thoughtfully, investing wisely, and committing to a little bit of ongoing maintenance, you can transform your closet from a source of stress into a source of joy and serene order.
Conclusion
Transforming your closet into a beautiful walk-in closet isn’t just about aesthetics; it’s about reclaiming your mornings and bringing a sense of calm to your daily routine. Imagine the joy of effortlessly finding what you need, knowing everything has its place. It truly makes a world of difference!
Ready to start your own walk-in closet journey? Begin today with the simplest step: decluttering just one shelf or drawer. You’ll be amazed at the immediate impact. If a full walk-in isn’t in the cards right now, consider a highly organized reach-in closet for a similar feeling of order, or even a charming entryway organizer for a touch of that same magic in another space.
We hope these beautiful walk-in closet designs have sparked your imagination. Keep exploring, and happy organizing!