Sarahpedia: the ultimate guide to transforming your home from cluttered chaos to serene sanctuary. Does the thought of finding a matching sock, a misplaced remote, or even just a clear surface send a shiver of frustration down your spine? You’re not alone! So many of us battle with the everyday overwhelm of a disorganised home, leaving us feeling stressed and unable to truly relax. Imagine walking into your living room and seeing beautifully organised shelves, a tidy entryway where everything has its place, and drawers that open smoothly to reveal precisely what you need. With a little guidance, this dream can be your reality! This isn’t about expensive makeovers; we’re talking about smart, affordable solutions that can take as little as a weekend to implement. Inside, you’ll discover simple, actionable strategies to declutter efficiently, create personalised storage systems, and maintain a home that feels both beautiful and functional. Get ready to reclaim your space and your peace of mind!
Transform Your Space with the Sarahpedia System: A Decor and Organization Masterclass
I’ve always believed that a well-organized home is a happy home. For years, I’ve experimented with different organizational systems, chasing that elusive sense of calm and order. Then, I discovered the Sarahpedia. It’s not a product you buy off the shelf; it’s a philosophy, a method, a way of thinking about your space that I’ve honed over time. The Sarahpedia is about creating functional, beautiful zones within your home that cater to your specific needs and lifestyle, making everyday living smoother and more enjoyable.
What You Need and Roughly What It Costs
The beauty of the Sarahpedia is its adaptability. You don’t need a vast array of specialized, expensive items. The core components are versatile and can be sourced from places like IKEA, Target, Amazon, or even repurposed from items you already own.
* **Modular Storage Units:** Think open shelves, cube units, or wall-mounted cabinets. For a medium-sized living room or bedroom, you might need 2-3 units. A good quality cube unit from IKEA, like the KALLAX, can range from $50 to $150 depending on size. Open shelving units can be similar, perhaps starting at $40 for smaller ones.
* **Drawer Inserts and Organizers:** These are crucial for corralling smaller items. A set of drawer dividers for kitchen or desk drawers might cost $15-$30. For larger drawers, you might need several. Fabric storage bins for cube units are also essential. These can be purchased in sets of 2-4 for $20-$40.
* **Wall-Mounted Solutions (if applicable):** If you can drill, wall shelves, pegboards, or even floating shelves add vertical storage. A simple 3-foot floating shelf might cost $20-$50. A pegboard with hooks and baskets can be around $50-$100.
* **Decorative Baskets and Trays:** These are your styling superheroes. Woven baskets, metal trays, or decorative boxes can range from $10 to $50 each, depending on material and size.
* **Label Maker or Nice Pens and Labels:** For clear identification, a label maker is a game-changer. A basic Dymo label maker is around $25-$40, with refill tapes costing $10-$20. Alternatively, nice pens and pre-made labels can work too, costing $5-$15.
* **Command Hooks and Strips (for renters/no-drill):** Essential for non-permanent hanging. A pack of various Command hooks and strips can cost $15-$30.
**Estimated Initial Cost:** For a moderately sized room, you’re likely looking at an investment of $200-$600. This is a one-time purchase that will pay dividends in reduced stress and a more functional home.
How to Measure and Plan Before You Start
This is the absolute cornerstone of the Sarahpedia. Rushing this step is a recipe for disaster.
1. **Assess Your Needs:** Walk through your home with a notepad and pen. What are your pain points? What items are constantly out of place? What activities do you want to facilitate more easily? For example, if your entryway is a black hole for keys, mail, and bags, that’s your first Sarahpedia zone.
2. **Measure Everything:**
* **The Space:** Measure the dimensions of the room or area you’re organizing. Note the width, depth, and height of walls, doorways, windows, and any existing furniture.
* **Your Belongings:** Take stock of what you need to store. Group similar items together. Measure the dimensions of larger items (e.g., a stack of books, a specific collection of hobby supplies).
* **Existing Furniture:** If you’re incorporating existing furniture, measure its footprint and internal dimensions (drawer depths, shelf heights).
3. **Sketch It Out:** Draw a rough floor plan of your space. Don’t worry about artistic talent! Use simple shapes. This is where you’ll start visualizing where your Sarahpedia zones will live.
4. **Consider Flow and Function:** Think about how you move through the space. Will your new organization hinder movement? Where do you most frequently need access to certain items? For example, if you’re organizing your kitchen, frequently used spices should be within easy reach of the stove.
5. **Create Zones:** Based on your needs assessment, start mapping out your Sarahpedia zones on your sketch. A living room might have zones for reading materials, entertainment devices, guest essentials, and decorative items. A bedroom might have zones for clothing, accessories, bedside essentials, and personal items.
The Sarahpedia Process: A Numbered Walkthrough
Once you’ve planned, it’s time to execute.
1. **Clear the Space:** Begin by completely emptying the area you’re focusing on. This is non-negotiable. It allows you to see the space with fresh eyes and ensures you’re not just reorganizing clutter.
2. **Sort and Declutter:** This is the most crucial decluttering phase. Go through every item you’ve removed. Use the “keep, donate, toss, relocate” method. Be ruthless! If you haven’t used it in a year, or if it doesn’t serve a clear purpose or bring you joy, it’s likely time to let it go.
3. **Assemble Your Storage:** Build your modular units, install your shelves, or prepare your Command hook placements according to your plan. Ensure everything is level and secure.
4. **Designate and Implement Zones:** Now, place your furniture and storage units according to your floor plan sketch. This is where your zones start to take physical shape.
5. **Contain and Organize:**
* Use drawer inserts and dividers to separate smaller items within drawers and cabinets. Group like with like. For example, all charging cables go in one section, pens and stationery in another.
* Utilize fabric bins and decorative baskets for open shelves and cube units. These are perfect for items that might look messy if left exposed, such as spare blankets, remotes, or craft supplies.
* Assign specific items or categories to each bin and shelf.
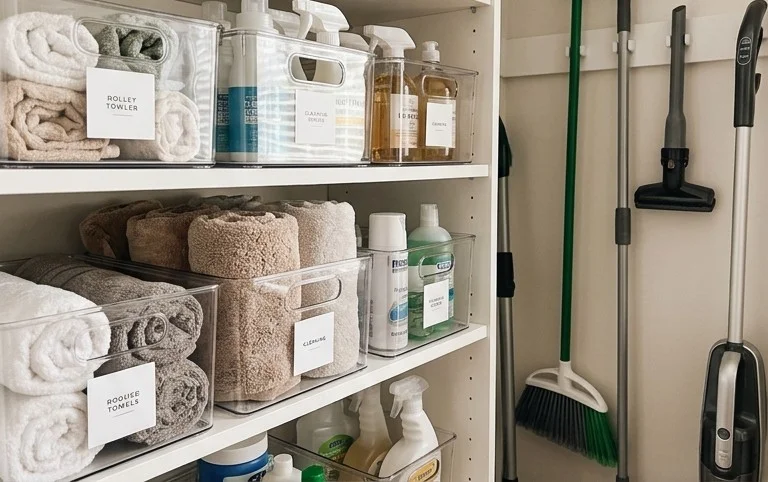
6. **Label Everything:** This is the final touch that makes the Sarahpedia truly functional. Label drawers, bins, shelves, and even sections within larger containers. This ensures everyone in the household knows where things belong.
7. **Style and Accessorize:** Add your decorative baskets, trays, and other personal touches. Place items on shelves and surfaces that are both beautiful and functional, considering the styling notes below.
8. **The Final Sweep:** Do a quick tidy to ensure everything is in its place and the space feels welcoming and organized.
Adapting the Sarahpedia for Small Spaces and Rentals
The Sarahpedia is a renter’s best friend! The key is using vertical space and non-permanent solutions.
* **Small Spaces:**
* **Maximize Verticality:** Opt for taller, narrower storage units rather than wide, bulky ones. Wall-mounted shelves are your friends.
* **Multi-Functional Furniture:** Choose pieces that serve dual purposes, like an ottoman with hidden storage or a coffee table with drawers.
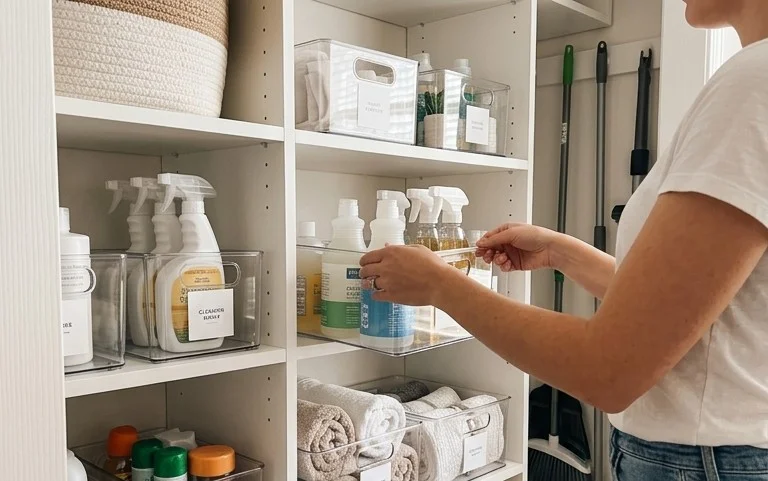
* **Clear Containers:** While decorative baskets are great, clear acrylic or plastic containers can help you see contents without opening, making items more accessible and reducing visual clutter.
* **Door Organizers:** Over-the-door shoe organizers can hold much more than shoes – think cleaning supplies, toiletries, or craft items.
* **Rentals (No Drilling Allowed):**
* **Command Products are Essential:** Stock up on Command hooks (various sizes), Command strips for hanging lightweight pictures and decor, and Command shelving options (though these are often limited to lighter loads).
* **Tension Rods:** These are invaluable for creating temporary dividers in cabinets or even as makeshift curtain rods for small windows.
* **Freestanding Units:** Focus on cube storage, bookshelves, and cabinets that don’t require wall attachment.
* **Leaning Ladders:** Decorative leaning ladders can be used to hang blankets, magazines, or even small decorative items with S-hooks.
### Styling Notes: Making it Look Good and Stay Functional
Organization doesn’t have to mean sterile!
* **Colour Palette:** Stick to a cohesive colour palette for your storage bins, baskets, and accessories. Neutrals (whites, greys, beiges, blacks) create a calming backdrop. You can then add pops of colour with smaller decorative items. If your storage units are a dark wood, consider lighter coloured bins to brighten the space.
* **Texture is Key:** Mix and match textures to add visual interest. Woven baskets add natural warmth, metal trays offer a modern edge, and soft fabric bins bring coziness.
* **The Rule of Three:** When styling shelves or surfaces, group items in odd numbers, particularly threes. This creates a more dynamic and pleasing visual. Vary heights and shapes within these groupings.
* **Placement for Purpose:**
* **High-Traffic Areas:** Keep essentials for these zones easily accessible. For an entryway, hooks for keys and a tray for mail should be at prime grabbing height.
* **Lower Shelves:** These are good for heavier items or things you access less frequently.
* **Higher Shelves:** Ideal for decorative items, books you’re not currently reading, or items you want to keep out of reach of children or pets.
* **”Beauty” vs. “Beast” Items:** Use decorative baskets and bins to hide less attractive but necessary items (like spare toiletries or cleaning supplies). Place visually appealing items like books, plants, or curated decor pieces on open shelves.
### Keeping It Tidy After Week One
The initial week of Sarahpedia is often magical. The challenge is maintaining it.
1. **The “One In, One Out” Rule:** For every new item that comes into your home, try to get rid of a similar item. This prevents accumulation.
2. **The Daily Reset (5-10 Minutes):** At the end of each day, dedicate a few minutes to putting things back in their designated homes. This is the most effective way to prevent clutter from creeping back in. Tidy up surfaces, return items to their labelled bins, and re-stack books.
3. **Weekly Quick Tidy (15-30 Minutes):** Once a week, do a slightly more thorough tidy. This might involve wiping down surfaces, refolding blankets that have been used, or putting away any items that have migrated from their zones.
4. **Regular Decluttering Sessions:** Schedule mini decluttering sessions every few months. Revisit your zones and see if anything has become redundant or if your needs have changed.
Mistakes That Make the Sarahpedia Fail
Even with the best intentions, a system can falter. Avoid these common pitfalls:
* **Not Decluttering Enough:** This is the cardinal sin. If you try to organize clutter, you’re just creating a beautifully organized mess. Be honest about what you truly need and use.
* **Over-Buying Storage:** Resist the urge to buy every pretty basket you see before you’ve properly planned. You might end up with storage that doesn’t fit your needs or space.
* **Poor Labeling (or No Labeling):** If you can’t easily identify what’s inside a bin or drawer, the system breaks down. Labels are your roadmap to ongoing organization.
* **Not Considering How You Actually Live:** The Sarahpedia must be tailored to *your* life. Don’t try to replicate someone else’s system if it doesn’t align with your habits and routines.
* **Lack of Maintenance:** The biggest reason any system fails is the lack of consistent upkeep. The daily and weekly resets are crucial for long-term success.
* **Making It Too Complicated:** The goal is simplicity and ease. If it’s too difficult to put things away, it won’t happen.
* **Ignoring Functionality for Aesthetics:** While a beautiful space is important, it must also be practical. Don’t sacrifice usability for the non-alcoholic sake of looking pretty. Ensure your chosen storage solutions are durable and fit your items well.
The Sarahpedia is a journey, not a destination. It’s about creating a home that supports you, reduces stress, and brings you joy. By planning carefully, executing thoughtfully, and committing to a little ongoing maintenance, you can transform your space into an organized, beautiful sanctuary.
Conclusion
Embracing home decor and organization isn’t just about aesthetics; it’s about transforming your everyday living. Imagine the peace of mind and reduced stress that comes from a clutter-free and beautifully curated space. The difference it makes to your daily routine, from finding things easily to simply enjoying your surroundings, is truly profound.
Ready to begin your journey? Your smallest first step could be as simple as clearing off one countertop or dedicating 15 minutes to a single drawer. Even this small act of home decor and organization can spark momentum.
Variations to Inspire:
For your bedroom, consider a stylish bedding refresh to instantly elevate your sanctuary.
On a tighter budget, focus on DIY organization solutions, like repurposing old jars for desk storage.
We hope these ideas have inspired you! Dive deeper into Sarahpedia for even more ways to create a home you love.