Cheap Fall Decor DIY Farmhouse Pumpkins are such a budget-friendly way to bring cozy autumn vibes into your home! Are you tired of looking around and seeing that same old bare spot where a touch of fall should be, or maybe those expensive decorative pumpkins just aren’t in the budget this year? I totally get it! Imagine a collection of charming, creamy white pumpkins, subtly distressed with a farmhouse feel, scattered across your mantel or adorning your entryway table. These beauties can be yours for under $10 and can be whipped up in about an hour! In this post, I’ll show you my favorite Dollar Tree hack to transform plain orange pumpkins into farmhouse perfection. We’ll dive into the simple steps and the few key supplies you’ll need to create a look that’s both stylish and incredibly affordable.
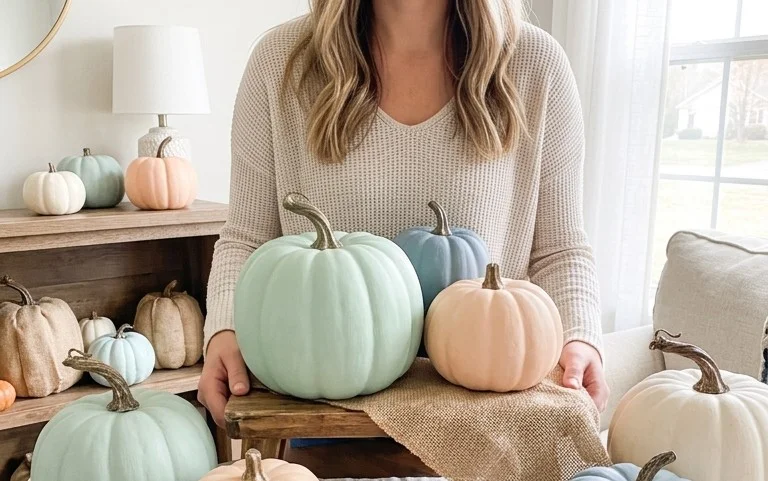
Cheap Fall Decor DIY: Dollar Tree Farmhouse Pumpkin Hack
As the leaves begin to turn and a crisp chill fills the air, my thoughts invariably drift to all things cozy and autumnal. And what says fall more than pumpkins? This year, I wanted to bring that quintessential farmhouse charm into my home without breaking the bank. Enter the Dollar Tree, my secret weapon for budget-friendly decor. With a little creativity and a few simple supplies, you can transform their humble plastic pumpkins into chic, farmhouse-inspired masterpieces. This DIY is surprisingly easy, incredibly affordable, and perfect for adding that touch of seasonal magic to any space.
Gathering Your Treasures: What You’ll Need and Roughly What It Costs
The beauty of this Dollar Tree hack is its affordability. You can achieve a stunning look for a fraction of the price of store-bought decor. Here’s what I typically gather:
* Plastic Pumpkins: I usually grab about 3-5 of various sizes, ranging from the small decorative ones (around 4-5 inches in diameter) to slightly larger ones (about 7-8 inches). These are usually priced at $1.25 each. So, for a small collection, this would be around $3.75 to $6.25.
* Craft Paint: You’ll need a few key colors. I always opt for a creamy white (like Waverly Chalk Paint in “Plaster” or a similar craft acrylic like Apple Barrel in “White”), a warm beige or tan (like FolkArt in “Wicker” or “Antique Parchment”), and a touch of black for depth (any basic black craft acrylic will do). You can often find small bottles of craft paint for $0.75 to $1.25 each. For three colors, this is roughly $2.25 to $3.75.
* Dollar Tree “Greenery” or Twine: Look for small bunches of faux eucalyptus, a spool of jute twine, or even some raffia. This will be for the pumpkin stems. These usually cost $1.25.
* Hot Glue Gun and Glue Sticks: A basic hot glue gun can be found at craft stores or even online for around $10-$15, and glue sticks are fairly inexpensive. If you already have one, this cost is $0.
* Optional: A small stencil if you want to add some lettering like “Fall” or “Harvest” (Dollar Tree often has these for $1.25). Some sandpaper (fine-grit) for a distressed look.
So, for a collection of 3-5 pumpkins, plus all the supplies you might need to buy new, you’re looking at a total investment of roughly $7.25 to $11.25. If you already have paint and a glue gun, your cost drops significantly!
A Little Planning Goes a Long Way
Before you dive headfirst into painting, take a moment to plan. This isn’t about complex blueprints, but rather a quick visual assessment.
* Consider Your Space: Where will these pumpkins live? On a mantel? A coffee table? A tiered tray? Think about the scale. If you have a small apartment, you might not need five large pumpkins; three smaller ones might be perfect. For a spacious home, a larger grouping will look more impactful.
* Color Palette: What are the dominant colors in the room where you’ll be displaying your pumpkins? While I love the classic farmhouse look with whites, creams, and tans, you can easily adapt this. If your room has more blues, incorporate a muted dusty blue. If it has warm oranges, a burnt sienna can be a beautiful addition. The key is to aim for muted, sophisticated tones rather than bright, primary colors.
* Texture: Think about how you want the final pieces to feel. Do you want them smooth and slightly distressed? Or do you prefer a more rustic, textured finish? This will influence your painting technique and whether you use sandpaper.
For my current setup, I decided on a grouping of three pumpkins – one medium, two small – to sit on my entryway console table. I’m aiming for a soft, creamy white base with hints of beige, and I want them to have a slightly aged, lived-in feel.
Your Step-by-Step Farmhouse Pumpkin Transformation
Now for the fun part! This process is straightforward and incredibly satisfying.
1. Clean Your Pumpkins: Give your plastic pumpkins a quick wipe-down with a damp cloth to remove any dust or residue. This ensures your paint adheres well.
2. Apply Your Base Coat: Using your creamy white or light beige paint, apply a thin, even coat over the entire pumpkin. Don’t worry about perfect coverage at this stage; we’re going for a layered look. Let this coat dry completely. This usually takes about 20-30 minutes depending on humidity.
3. Add Your Second Layer (Optional but Recommended): Once the base coat is dry, apply another layer, but this time, mix in a little bit of your beige or tan paint with the white. You can either paint the entire pumpkin with this slightly darker shade or, for a more layered effect, apply it in patches, allowing some of the base coat to show through. Again, let it dry.
4. Create a Distressed Look (Optional): If you’re going for that perfectly aged farmhouse vibe, this is where sandpaper comes in. Once your paint is completely dry, gently rub a fine-grit sandpaper over the surface of the pumpkin. Focus on raised areas and edges. This will subtly reveal the underlying plastic and create a beautiful, worn effect. Wipe away any dust with a dry cloth.
5. Add Depth and Shadow with a Wash: This step really makes the pumpkins sing! In a separate small container, mix a small amount of black craft paint with water. You want a thin, watery consistency – like diluted ink. Using a brush, liberally apply this wash over the entire pumpkin, letting it settle into the crevices and lines. Don’t be afraid to let it pool a little.
6. Wipe Away the Excess: Immediately after applying the wash, take a clean, damp cloth or paper towel and gently wipe away the excess paint. This is where the magic happens! The wash will settle into the carved lines and recesses, giving your pumpkins dimension and an antique appearance. You can control the intensity by how much you wipe away.
7. Paint the Stems: Use a bit of brown or black paint to give the original plastic stems a more natural look. You can dry brush some lighter brown or beige over the dark color for added realism.
8. Attach Your New Stem: Once the paint is completely dry, use your hot glue gun to attach your chosen embellishment to the top where the original stem was. This could be a small bunch of faux eucalyptus, a swirl of jute twine, or a few strands of raffia. This adds that final, authentic farmhouse touch.
Adapting for Small Spaces and Rentals
The beauty of this DIY is its adaptability. You don’t need to drill holes or use permanent adhesives.
* For Rentals: Since we’re using hot glue for the stems, and the paint is applied directly to the plastic, there’s no permanent alteration to the pumpkins. They can be easily cleaned and stored for future use. If you’re worried about paint residue on surfaces, place a clear plastic mat or a piece of parchment paper under where you’re painting.
* For Small Spaces: Opt for smaller pumpkins and a more minimalist arrangement. Instead of a large cluster, maybe one or two perfectly placed pumpkins on a bookshelf or bedside table will provide the desired autumnal feel without overwhelming the space. Consider stacking two smaller ones for a bit of height.
Styling Your Farmhouse Pumpkins
Now that your pumpkins are transformed, it’s time to let them shine!
* Color Harmony: If you’ve used a creamy white base, these pumpkins will blend seamlessly with most existing decor. They offer a neutral backdrop that allows other seasonal elements to pop.
* Texture Play: Combine your painted pumpkins with other natural textures like wood (think wooden bowls or trays), woven baskets, or chunky knit blankets. This creates a rich, tactile display.
* Placement: Don’t just plop them down anywhere. Group them in odd numbers (three or five are always visually appealing). Arrange them on a mantelpiece with some faux greenery and candles. Place a few on a coffee table as a central focal point. A small grouping on a kitchen counter can add a touch of warmth. For a tiered tray, vary the heights and textures for visual interest. I like to place my larger painted pumpkins towards the back and smaller ones in front to create depth.
Keeping It Tidy After Week One
Once your pumpkins are in place, the beauty of this DIY is their low maintenance.
* Dusting: A quick dusting with a microfiber cloth is usually all that’s needed. Since the paint is durable, you can gently wipe them down.
* Spot Cleaning: If any spills or marks occur, a slightly damp cloth should do the trick. Avoid harsh chemicals that could damage the paint.
* Storage: When the season is over, simply wipe them down and store them in a box or bag. The plastic construction makes them durable for years of use.
The Mistakes That Make This DIY Fail
While this project is quite forgiving, there are a few pitfalls to avoid that can make your DIY not quite hit the farmhouse mark:
* Using Gloopy, Uneven Paint: Over-applying paint without letting it dry properly between coats will result in a streaky, unprofessional finish. Thin, even coats are key.
* Skipping the Wash Step: While a solid coat of paint looks nice, it’s the diluted black wash that gives the pumpkins that authentic aged, dimensional look. Don’t skip this!
* Too Much Black Wash: Conversely, using too much black wash and not wiping enough away will make your pumpkins look muddy and dirty, rather than artfully distressed. Aim for a subtle darkening of the recesses.
* Ignoring Texture in Styling: Simply placing your identical pumpkins in a line will look a bit sterile. Varying sizes, heights, and adding contrasting textures in your styling will elevate the look.
* Overdoing the Glitter or Sparkle: Farmhouse decor leans towards natural, rustic elements. While a touch of metallic can be nice on a stem, avoid anything too sparkly or artificial.
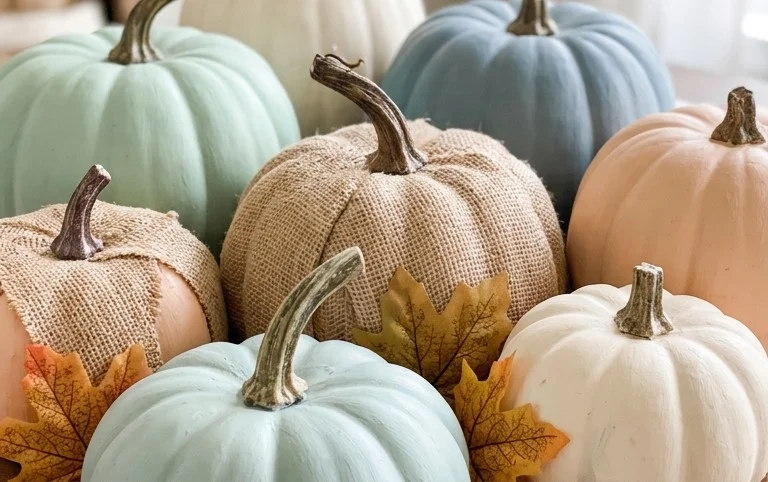
This Dollar Tree pumpkin hack is a delightful way to embrace the autumn spirit. It’s a project that’s not only budget-friendly but also incredibly rewarding. With a little creativity and these simple steps, you can bring a touch of charming farmhouse fall to your home without spending a fortune. Happy decorating!
Conclusion
Isn’t it amazing how a few simple touches can transform your home into a cozy fall haven? These Dollar Tree hack farmhouse pumpkins are proof that beautiful, seasonal decor doesn’t need to break the bank. Waking up to these charming accents each day brings a little extra warmth and cheer, making even the mundane feel more special.
Ready to get started? Your smallest first step today could be grabbing just one dollar store pumpkin and deciding on your paint color. Looking for a different vibe? Try adding a touch of rustic charm to your mantel with some faux greenery and twine, or create a budget-friendly centerpiece for your kitchen table using a wooden crate and mini gourds. There are endless possibilities to infuse your space with fall’s embrace.
We hope this inspires you to get creative! Don’t hesitate to explore more ideas for transforming your home into a welcoming retreat.