Crochet cauldron coasters are the perfect little project to banish those dreaded water rings from your furniture! Does this sound familiar: you’re enjoying a cozy night in, maybe with a steaming mug of tea or a chilled glass of something fizzy, only to notice an unwelcome damp patch forming on your coffee table? We’ve all been there! Imagine adorning your living space with these charming, miniature cauldrons, each one a handcrafted shield for your surfaces, adding a touch of whimsical witchy flair. These delightful creations can often be made in under an hour with just a few yards of yarn, costing mere pennies for materials. In this guide, I’ll walk you through exactly how to whip up your own set, from choosing the right yarn to mastering a few simple stitches, ensuring your home stays both stylish and protected.
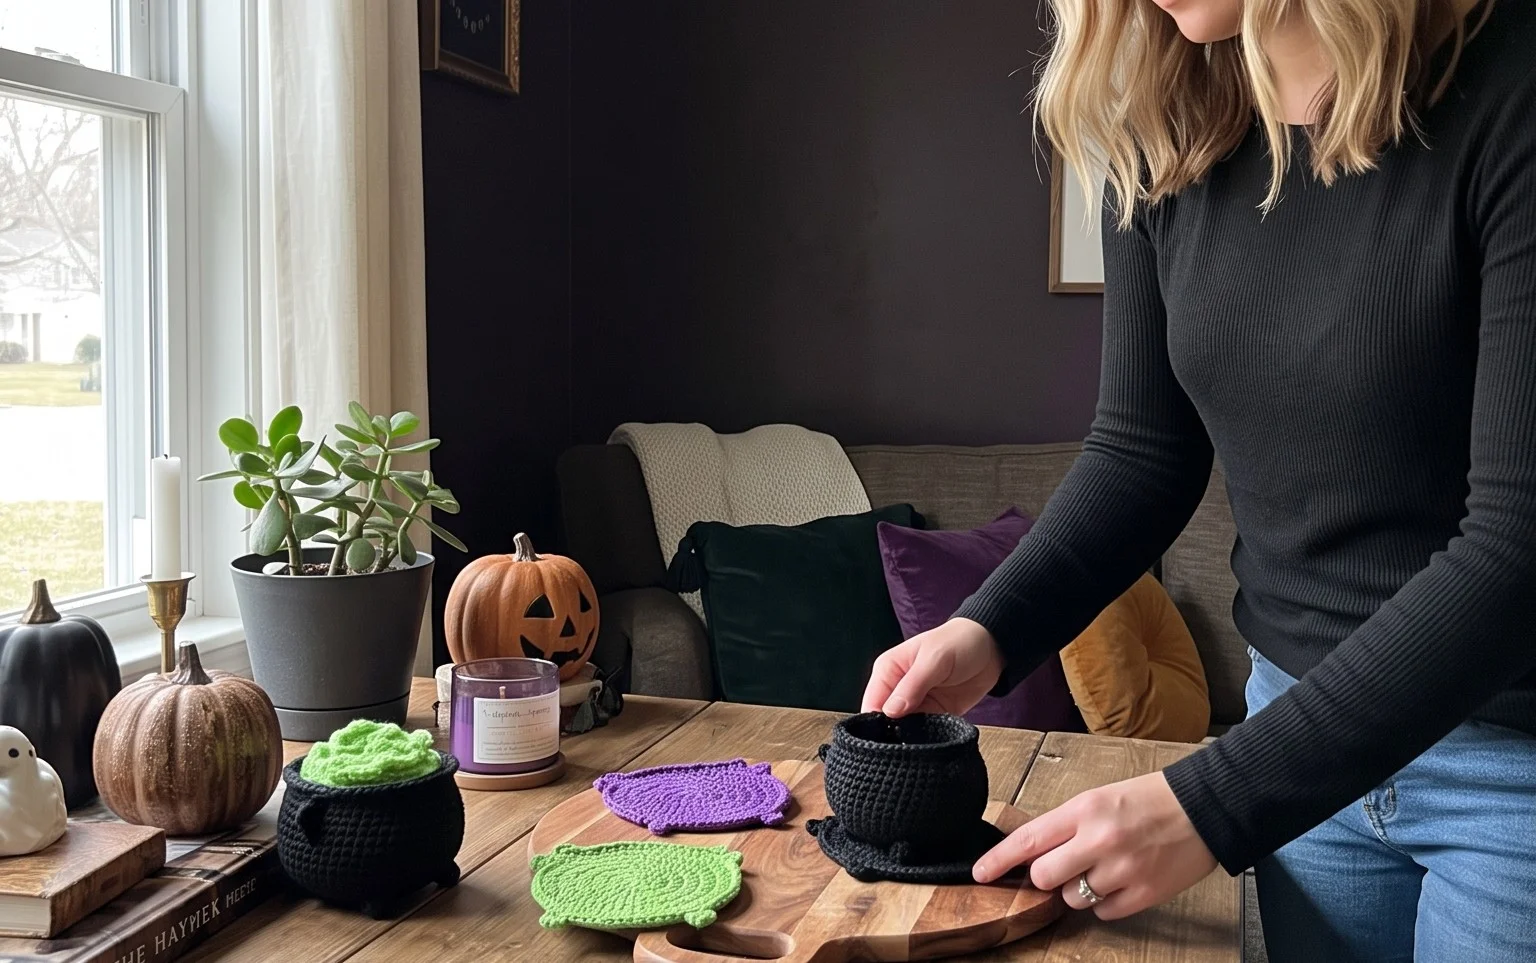
Crafting Your Own Cauldron Coasters: A Spooky and Stylish DIY
As the leaves begin to turn and a crisp chill fills the air, there’s a certain magic that descends upon our homes. It’s the perfect season to embrace a touch of the whimsical, and what better way to do that than with a DIY project that’s both functional and fun? Today, we’re diving into the delightful world of crochet to bring you a step-by-step guide to creating your very own Crochet Cauldron Coasters. These aren’t just any coasters; they’re miniature works of art, adding a playful, spooky charm to your coffee table or side table. Whether you’re a seasoned crocheter or a curious beginner, this project is sure to spark your creativity.
What You’ll Need and What It Costs
Gathering your supplies is the first exciting step! For these adorable cauldron coasters, you won’t need much. I’ve found that the cost is surprisingly affordable, making it a budget-friendly way to inject some seasonal flair into your home.
* **Yarn:** For this project, I recommend using a worsted weight cotton yarn. Cotton is excellent for coasters as it’s absorbent and durable. For a classic cauldron look, a deep black is ideal. For a bit of variety, consider a charcoal grey, a deep forest green, or even a rich plum. You’ll likely need about 50-100 grams of yarn total, depending on how many coasters you plan to make. A standard 100-gram skein typically costs between $4 and $7. So, for a set of four coasters, you’re looking at approximately $5-$10 for yarn.
* **Crochet Hook:** A 5.0mm (H/8) crochet hook is usually perfect for worsted weight yarn. These hooks are widely available and generally cost between $2 and $4.
* **Scissors:** A good pair of sharp scissors is essential for snipping yarn. You probably already have a pair, but if not, a decent pair will set you back about $5.
* **Yarn Needle:** A blunt-tipped yarn needle is crucial for weaving in those pesky ends to give your coasters a polished finish. These are usually around $3-$5 for a pack.
* **Optional: Stitch Marker:** While not strictly necessary, a stitch marker can be incredibly helpful, especially when you’re working in the round. They cost about $2-$3 for a pack.
In total, for a beginner looking to buy everything, you’re probably looking at a total investment of around $15-$20 to get started. If you already have some of these supplies, your cost will be even lower!
Measuring and Planning Before You Start
Before you even pick up your hook, a little bit of planning goes a long way. The beauty of crochet is its adaptability, but a quick measurement can ensure your coasters are the perfect size for your needs.
* **Cup Size:** Grab your favorite mugs and glasses. Measure the diameter of the base of each. Most standard mugs are around 3-4 inches (7.5-10 cm) in diameter. Our crochet pattern will create a coaster that slightly exceeds this, providing a good safety margin to catch condensation.
* **Hook and Yarn Gauge:** While we’re using a recommended hook size, it’s always a good idea to make a small test swatch. For me, with the suggested yarn and hook, I aim for a fabric that’s not too stiff and not too loose. If your gauge feels too tight, try a slightly larger hook (e.g., 5.5mm). If it’s too loose and your stitches are gaping, go down a hook size (e.g., 4.5mm). This small step ensures your finished coasters will be the right size and density.
* **Number of Coasters:** How many do you need? A standard set is often four, but you might want more for entertaining. Consider the number of people in your household and how often you host guests. This simple decision will dictate how much yarn you need to purchase.
The Crochet Cauldron Coaster: A Step-by-Step Walkthrough
Now for the fun part – the crocheting! This pattern is designed to be relatively straightforward, even for those who are newer to crochet. We’ll be working in the round, creating a circular shape with a bit of texture to mimic the cauldron.
1. **Magic Ring (or Chain 4, Join):** Start by creating a magic ring. This creates a tight center for your coaster. If you’re not comfortable with a magic ring, you can chain 4 stitches and then join with a slip stitch to the first chain to form a small ring.
2. **Round 1: (Sc, ch 1) 6 times:** Insert your hook into the magic ring (or the small chain ring). Work 1 single crochet (sc) stitch, then chain 1. Repeat this sequence 5 more times, for a total of 6 sc stitches and 6 ch-1 spaces. Pull the tail of your magic ring tight to close the center. Join with a slip stitch to the first sc.
3. **Round 2: (2 sc in next ch-1 space, ch 1) 6 times:** Now, you’ll be working into the chain spaces from the previous round. In each ch-1 space, work 2 single crochet stitches, followed by 1 chain stitch. Repeat this 6 times around. Join with a slip stitch to the first sc. You should now have 12 sc stitches and 6 ch-1 spaces.
4. **Round 3: (Sc in next 2 sc, 2 sc in next ch-1 space, ch 1) 6 times:** This round starts to build your circle. Work 1 sc in the next 2 sc stitches. Then, in the next ch-1 space, work 2 sc stitches, followed by 1 chain stitch. Repeat this sequence 6 times around. Join with a slip stitch to the first sc. You should now have 18 sc stitches and 6 ch-1 spaces.
5. **Round 4: (Sc in next 3 sc, 2 sc in next ch-1 space, ch 1) 6 times:** Continue increasing. Work 1 sc in the next 3 sc stitches. In the next ch-1 space, work 2 sc stitches, followed by 1 chain stitch. Repeat this sequence 6 times around. Join with a slip stitch to the first sc. You should now have 24 sc stitches and 6 ch-1 spaces.
6. **Round 5: (Sc in next 4 sc, 2 sc in next ch-1 space, ch 1) 6 times:** One more increase round to get a nice, flat circle. Work 1 sc in the next 4 sc stitches. In the next ch-1 space, work 2 sc stitches, followed by 1 chain stitch. Repeat this sequence 6 times around. Join with a slip stitch to the first sc. You should now have 30 sc stitches and 6 ch-1 spaces.
7. **Round 6 (Forming the Cauldron Edge):** This is where we create the distinct cauldron shape. We’ll switch to working around the entire edge.
* Work 1 sc in each of the next 5 sc stitches.
* In the next ch-1 space, work 1 sc.
* Work 1 sc in each of the next 5 sc stitches.
* In the next ch-1 space, work 1 sc.
* Repeat this sequence around for a total of 30 sc stitches. Join with a slip stitch to the first sc.
8. **Round 7 (Adding Texture/Rim):** For this round, we’ll create a slightly raised edge to give it that cauldron feel.
* Chain 2 (counts as your first half double crochet, hdc).
* Work 1 hdc in the same stitch.
* Work 1 hdc in each of the next 30 stitches around.
* Join with a slip stitch to the top of the starting chain-2.
9. **Fasten Off:** Cut your yarn, leaving about a 6-inch tail, and pull the tail through the last loop on your hook to secure. Thread this tail onto your yarn needle and weave it through the back of your stitches to hide it securely. Repeat this process for any yarn tails from starting your rounds.
Congratulations! You’ve just crocheted your first cauldron coaster. Repeat these steps for as many coasters as you desire.
Styling Your Cauldron Coasters
Now that your cauldrons are ready, let’s talk about how to style them to perfection. The beauty of these coasters lies in their simplicity and their ability to complement a variety of decor styles.
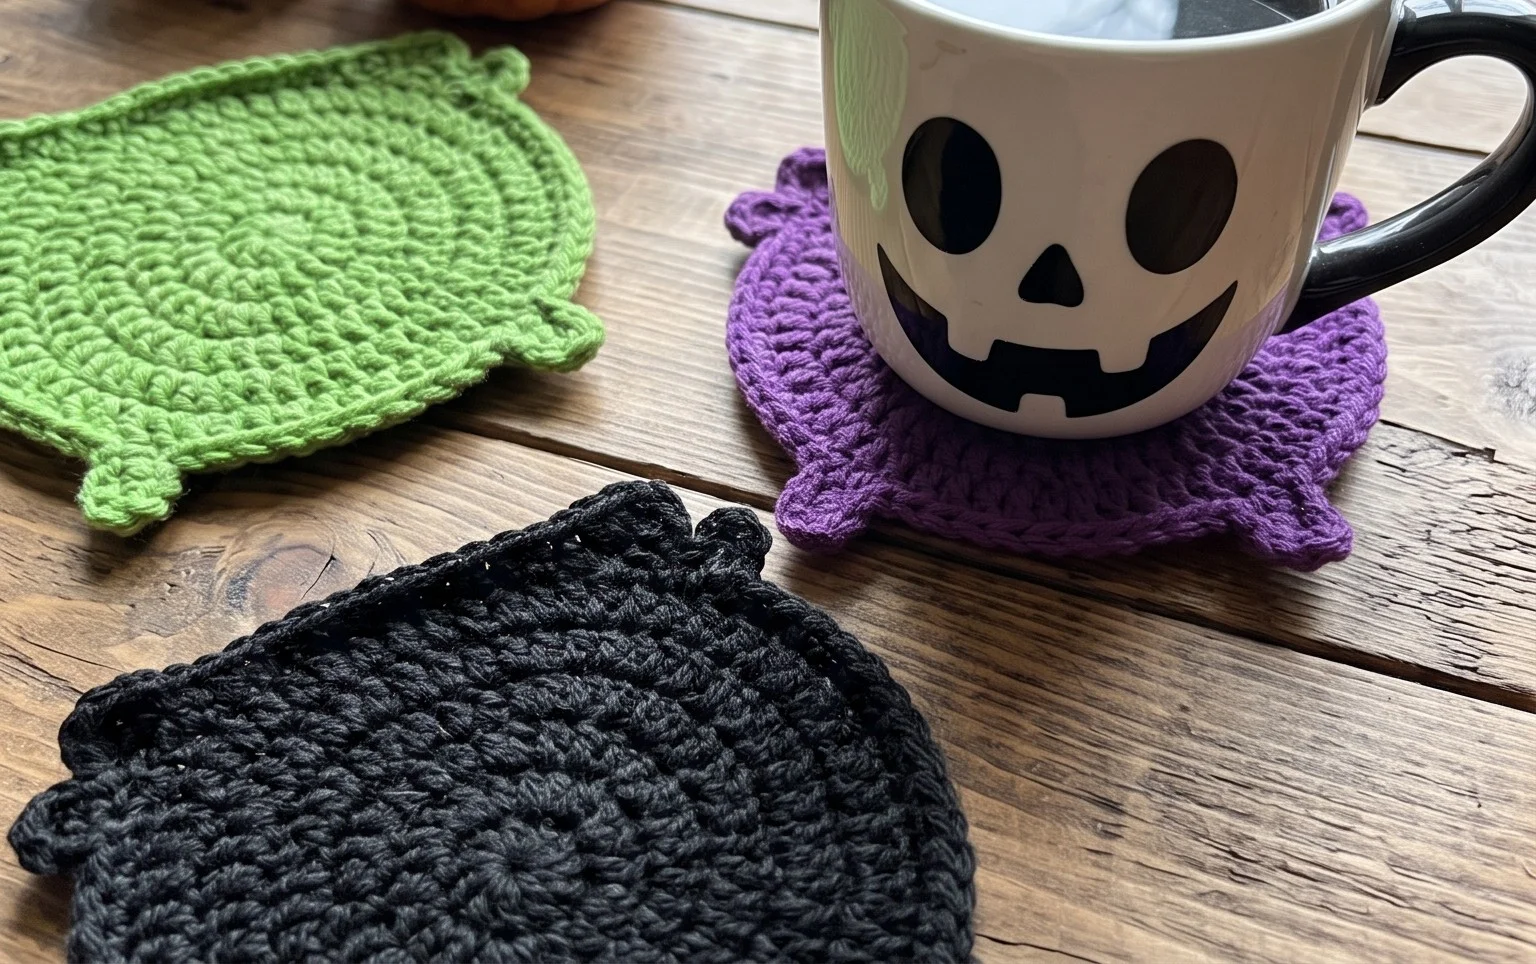
* **Color Palette:** While black is classic, don’t be afraid to experiment! Deep jewel tones like emerald green, sapphire blue, or amethyst purple can be incredibly sophisticated. A charcoal grey offers a softer, more muted vibe. For a truly festive touch, consider a deep orange or a rusty brown. I love pairing a mix of colors for a more eclectic look.
* **Texture Play:** The crochet texture itself adds a lovely dimension. To enhance this, consider the texture of your drinks. A chunky ceramic mug or a sleek glass tumbler will look fantastic against the crocheted fabric.
* **Placement:** Group your coasters together on a coffee table for a striking centerpiece, or scatter them on side tables for accessibility. They look particularly charming flanking a decorative pumpkin, a bowl of seasonal potpourri, or a stack of your favorite spooky reads. When in use, a full glass or mug will sit comfortably within the coaster, its base fully supported. Don’t overcrowd the surface with too many coasters when not in use; let their individual charm shine.
Keeping it Tidy After Week One
The beauty of cotton crochet is its durability and washability. After your first week of use, you might notice a stray bit of lint or a minor coffee ring.
* **Gentle Hand Wash:** For most spills, a gentle hand wash is sufficient. Use lukewarm water and a mild detergent. Gently work the soap into the fabric and rinse thoroughly.
* **Reshaping:** After washing, gently squeeze out excess water – don’t wring them out! Lay your coasters flat on a clean towel and reshape them to their original circular form.
* **Air Dry:** Allow them to air dry completely. Avoid direct sunlight for prolonged periods, which can fade colors over time.
* **Lint Removal:** For any stray lint, a lint roller or even a piece of tape can work wonders.
Mistakes That Make This Project Fail
Even with a simple project like this, there are a few pitfalls that can lead to less-than-stellar results. Being aware of these can help you avoid them:
* **Ignoring Gauge:** As I mentioned earlier, not checking your gauge can lead to coasters that are too small or too large, or that have holes. A quick swatch is worth the effort!
* **Over-Stretching:** When working your stitches, try to maintain consistent tension. If you pull your yarn too tight, your coaster might curl up. If you crochet too loosely, it might lie flat but have gaps. Aim for a comfortable, even tension.
* **Skipping the Weaving In:** This is the most common mistake that makes projects look unfinished. Properly weaving in your yarn tails with a yarn needle is crucial for a clean, professional look and to prevent your coasters from unraveling.
* **Not Counting Stitches:** It’s easy to lose count when you’re focused on the pattern. Periodically counting your stitches in each round, especially during the increasing rounds, will ensure your circle is forming evenly and prevent wonky shapes.
* **Using the Wrong Yarn:** While acrylic yarn can be used, cotton is ideal for coasters due to its absorbency. Using a yarn that isn’t washable or is prone to pilling might make your coasters less functional and harder to maintain.
Creating these Crochet Cauldron Coasters is a rewarding experience that adds a touch of handmade charm and seasonal spirit to your home. So grab your yarn, your hook, and get ready to conjure up some cozy, spooky style!
Conclusion
These Crochet Cauldron Coasters are more than just a cute craft; they’re a charming way to add a touch of whimsy and practical protection to your everyday life. Imagine your favorite mug resting on these delightful little cauldrons – it’s a small detail that can truly brighten your morning coffee or afternoon tea routine, preventing those pesky water rings while bringing a smile to your face.
Ready to start today? The smallest first step is simply to gather your yarn and hook. Even one coaster made can be a satisfying accomplishment!
For a different vibe, consider using vibrant, bold colors in your kitchen for a playful pop, or neutral, sophisticated tones for a cozy reading nook. If budget is a concern, a single skein of yarn can create several coasters, making this an incredibly affordable project.
We hope these Crochet Cauldron Coasters inspire you to embrace handmade charm in your home. Keep exploring for more delightful decor and organization ideas!