Quick and easy crochet pumpkin pattern for beginners – that’s exactly what we need when those bare spots start popping up, isn’t it? You know the feeling, right? That little corner of the bookshelf that’s just… waiting. Or maybe your mantelpiece feels a bit too plain for the season. It’s time to add a touch of cozy charm without a fuss!
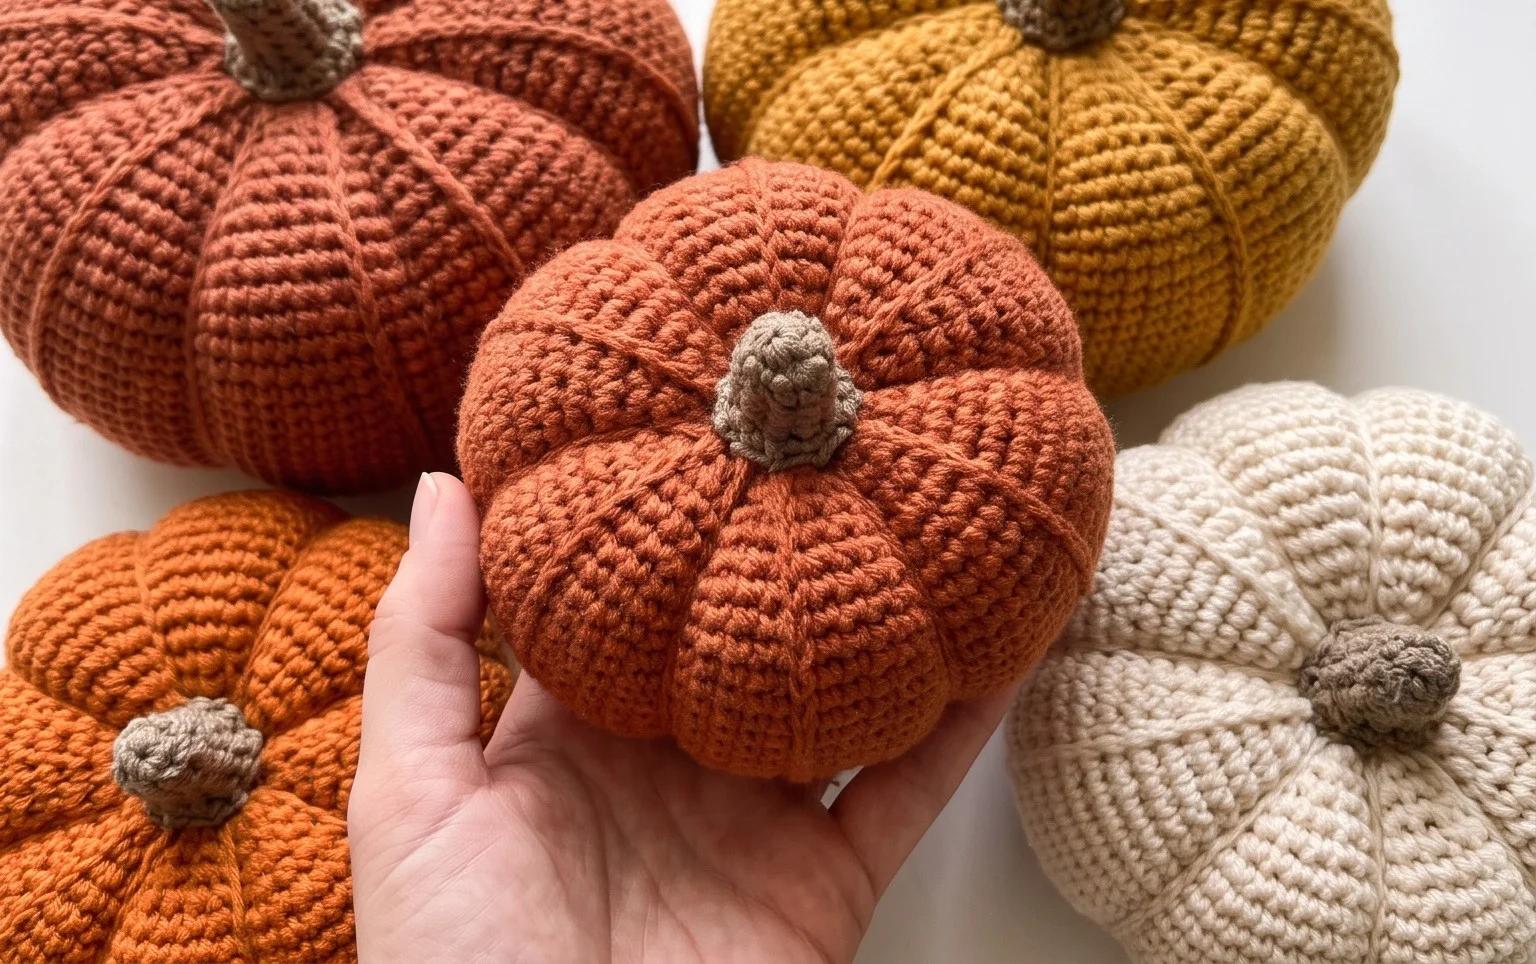
Imagine a small, plump crochet pumpkin, its textured stitches a warm hug of autumnal color. These little beauties are surprisingly inexpensive to make, often costing just a few dollars in yarn, and you can whip one up in under an hour. In this article, I’ll walk you through each simple step, showing you how to create these delightful decor pieces, even if you’ve never picked up a crochet hook before. Get ready to bring a little handmade harvest into your home!
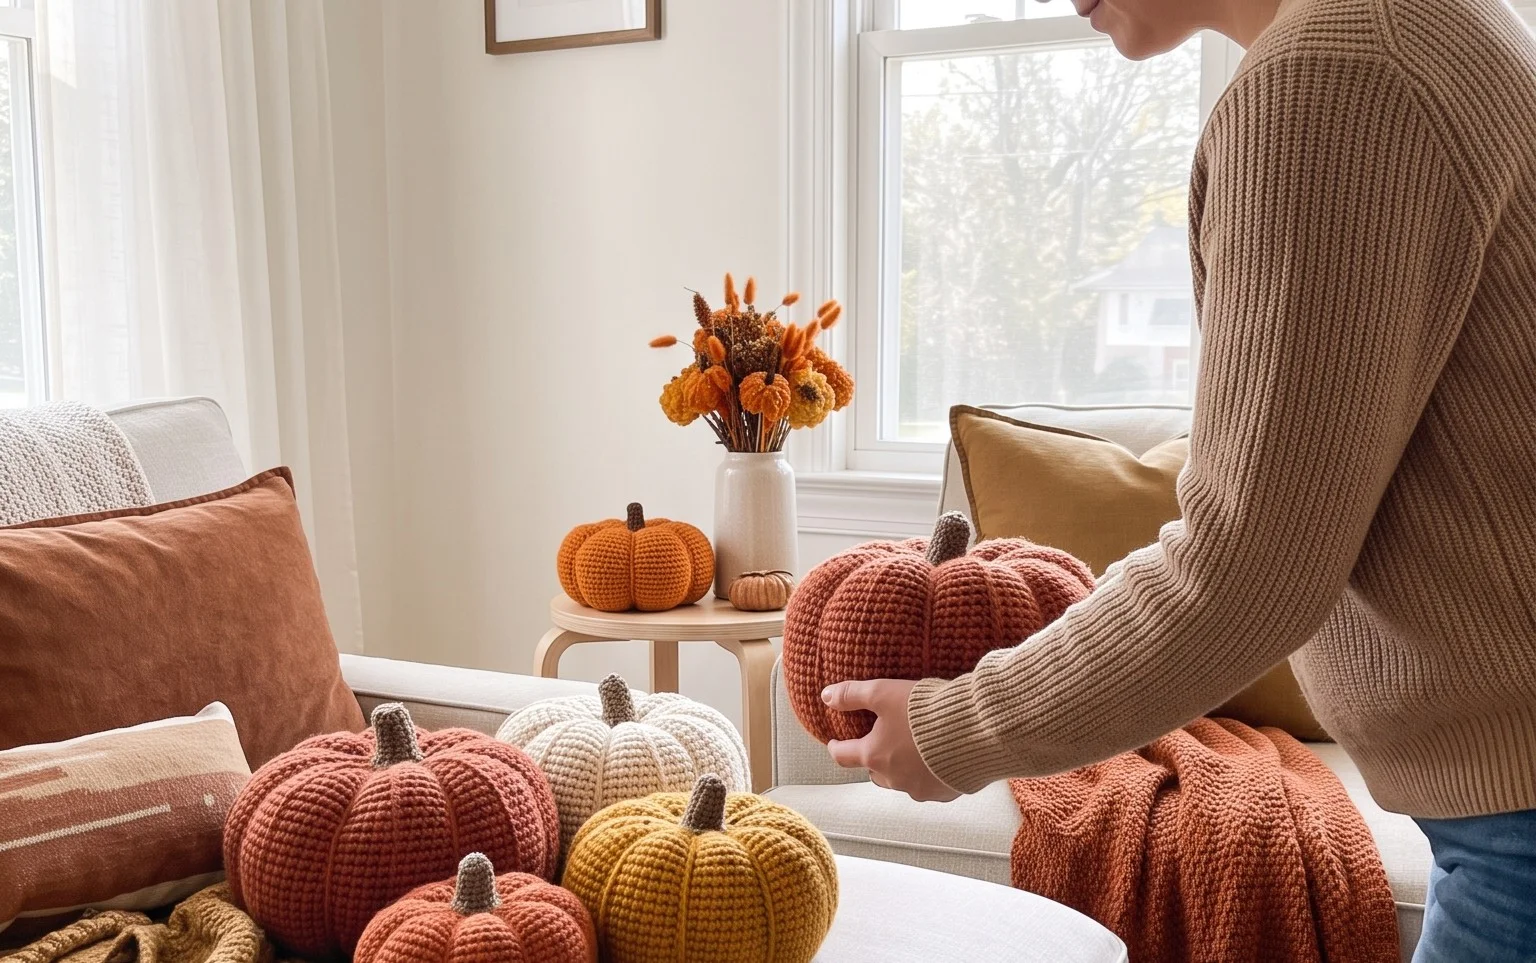
Cozy Up Your Space with a Quick and Easy Crochet Pumpkin!
Fall is here, and there’s nothing quite like the cozy, welcoming feeling that a few well-placed pumpkins can bring to your home. But what if you’re renting, or just want a charming, no-fuss way to add some seasonal flair without permanent fixtures? Enter the humble crochet pumpkin! Not only are they incredibly cute and versatile, but they are also surprisingly simple to make, even for complete beginners. In this guide, I’ll walk you through everything you need to know to craft your own little yarn masterpieces, from gathering your supplies to styling them like a pro. Get ready to inject some handmade warmth into your autumn decor!
What You’ll Need and What It Costs
The beauty of this project lies in its simplicity and affordability. You don’t need a vast array of specialized tools. Here’s what I recommend:
* **Yarn:** For a medium-sized pumpkin (around 6-8 inches in diameter), you’ll likely need one skein of worsted-weight yarn. I love working with acrylic yarn for these projects because it’s durable, washable, and comes in a fantastic range of autumnal colours. Look for shades like burnt orange, deep red, mustard yellow, or even a creamy beige. A typical skein of worsted-weight acrylic yarn costs between $4 and $7. If you’re making a few pumpkins, consider buying a multi-pack of yarn if available, which can sometimes offer a slight discount. For this project, let’s budget around $5 per pumpkin for yarn.
* **Crochet Hook:** For worsted-weight yarn, a 5mm (US size H/8) crochet hook is a great starting point. If your tension is a bit loose, you might go down to a 4.5mm (US size G/6). Hooks are very affordable; you can usually find a good quality one for about $3 to $6.
* **Stuffing:** Polyester fiberfill is your best friend here. You’ll need a bag of it, which generally costs between $5 and $10 and will last you for many, many crochet projects. For one pumpkin, you’ll use a handful, maybe a cup or so.
* **Scissors:** Any pair of sharp scissors will do.
* **Tapestry Needle:** This is a blunt-tipped needle with a large eye, perfect for weaving in yarn ends and for the final cinching of the pumpkin. These are usually around $2-$3.
* **Optional (for stems):** A small piece of brown or green yarn, or even a bit of felt cut into a stem shape.
So, for one charming crochet pumpkin, your estimated cost is roughly $10-$16, depending on the yarn and hook you choose. That’s a fantastic deal for a handmade decor item that can be used year after year!
Measuring and Planning Before You Start
Before you even pick up your hook, a little bit of planning goes a long way. This project is designed to be flexible, but a basic understanding of what you want will help.
First, decide on the size of your pumpkin. Are you picturing a small, decorative accent, or a larger statement piece? For this beginner pattern, we’ll aim for a medium-sized pumpkin, roughly 6-8 inches in diameter when stuffed.
Next, consider the colours. Think about your existing decor. Do you want traditional oranges and browns? Or are you feeling more modern with creams, greys, and deep jewel tones? Having a colour palette in mind will make your yarn selection easier and ensure your finished pumpkins integrate seamlessly into your home.
Finally, think about where you’ll display them. This is especially important for renters or those in small spaces. Are they going on a mantelpiece, a bookshelf, or a side table? Knowing the general area will help you determine the number and size of pumpkins you want to make.
The Quick and Easy Crochet Pumpkin Pattern: A Step-by-Step Walkthrough
This pattern uses only two basic crochet stitches: the single crochet (sc) and the slip stitch (sl st). It’s worked in the round, creating a seamless fabric.
Here’s how we’ll do it:
1. **Create a Magic Ring:** This is a way to start a crochet project in the round with a tight center. If you’re new to magic rings, don’t worry! There are plenty of video tutorials online that show you how. Alternatively, you can chain 4 and join with a slip stitch to the first chain to form a ring.
2. **Round 1:** Work 6 single crochets into the magic ring. Pull the tail of the magic ring tight to close the hole. Slip stitch to the first single crochet to join the round. (6 stitches)
3. **Round 2:** Chain 1 (this does not count as a stitch). Work 2 single crochets in each stitch around. Slip stitch to join. (12 stitches)
4. **Round 3:** Chain 1. Work *1 single crochet in the next stitch, 2 single crochets in the next stitch*. Repeat from * to * around. Slip stitch to join. (18 stitches)
5. **Round 4:** Chain 1. Work *1 single crochet in the next 2 stitches, 2 single crochets in the next stitch*. Repeat from * to * around. Slip stitch to join. (24 stitches)
6. **Round 5:** Chain 1. Work *1 single crochet in the next 3 stitches, 2 single crochets in the next stitch*. Repeat from * to * around. Slip stitch to join. (30 stitches)
7. **Rounds 6-12 (or until desired circumference is reached):** Chain 1. Work 1 single crochet in each stitch around. Slip stitch to join. (30 stitches)
* *Note: The number of rounds here determines the height of your pumpkin. For a medium pumpkin, 7 rounds are usually sufficient. You can adjust this for shorter or taller pumpkins.*
8. **Begin Decreasing:** Now we’ll start to shape the top of the pumpkin.
* **Round 13:** Chain 1. Work *1 single crochet in the next 3 stitches, then work a single crochet decrease (sc2tog – insert hook into next stitch, yarn over, pull up a loop, insert hook into the next stitch, yarn over, pull up a loop, yarn over, and pull through all 3 loops on the hook)*. Repeat from * to * around. Slip stitch to join. (24 stitches)
* **Round 14:** Chain 1. Work *1 single crochet in the next 2 stitches, sc2tog*. Repeat from * to * around. Slip stitch to join. (18 stitches)
* **Round 15:** Chain 1. Work *1 single crochet in the next stitch, sc2tog*. Repeat from * to * around. Slip stitch to join. (12 stitches)
9. **Stuffing and Finishing:**
* Before you close the top completely, it’s time to stuff your pumpkin! Gently stuff it with fiberfill, pushing it down towards the bottom. Aim for a firm, round shape.
* **Round 16:** Chain 1. Work sc2tog in each stitch around. Slip stitch to join. (6 stitches)
10. **Close the Top:** Cut your yarn, leaving a tail of about 6 inches. Thread this tail onto your tapestry needle. Weave the needle through the front loop of each remaining stitch, pulling the yarn tight to cinch the top closed. Weave in your ends securely.
11. **Add the Stem:** If you’re adding a yarn stem, use your tapestry needle and brown or green yarn to create a short, slightly curved stem at the top. You can also simply cut a small stem shape from felt and stitch it on.
Adapting for Small Spaces or Rentals
The beauty of crochet pumpkins is their inherent portability and lack of need for any permanent installation. They are perfect for adding seasonal charm without a single nail or screw.
* **Small Spaces:** Focus on making smaller pumpkins or using a more limited colour palette. A few 3-4 inch pumpkins clustered together can be just as impactful as one large one. You can also group them in bowls or trays on coffee tables, consoles, or even windowsills.
* **Rentals:** Since these are soft, freestanding decor items, they are ideal for rentals. You can place them on existing shelves, mantels, or even directly on the floor for a whimsical touch. No need to worry about damaging walls or surfaces.
Styling Notes: Colour, Texture, and Placement
Now for the fun part – making your crochet pumpkins look amazing!
* **Colour:** Embrace the autumnal palette! Think beyond just orange. Deep burgundies, rich mustards, creamy whites, and forest greens are all wonderful choices. Mixing and matching colours adds visual interest. For a more modern look, try a monochromatic scheme with different shades of beige or grey.
* **Texture:** The crochet stitches themselves provide a lovely texture. To enhance this, consider mixing your crochet pumpkins with other textured elements. Think chunky knit throws, woven baskets, ceramic vases, or even some real (or faux!) fall foliage.
* **Placement:** Don’t be afraid to group your pumpkins. A cluster of three or five of varying sizes looks more organic than a single, isolated pumpkin.
* **Mantelpiece:** Arrange them alongside candles, garlands, or even framed photos.
* **Bookshelf:** Tuck them in amongst your books for a pop of colour and coziness.
* **Entryway:** Place them in a bowl or on a console table to greet guests with a warm welcome.
* **Coffee Table:** Create a charming centerpiece by arranging them with some seasonal greenery or pinecones.
* **Rental-Friendly Tip:** Use trays or platters to group your pumpkins. This helps define their space and also makes them easy to move when you need to tidy up.
Keeping It Tidy After Week One
One of the best things about crochet pumpkins is how low-maintenance they are.
* **Dusting:** A gentle dusting with a soft cloth or a feather duster is usually all that’s needed.
* **Shaping:** If your pumpkins lose a bit of their shape after being handled or moved, simply give them a gentle squeeze and reshape them. The fiberfill stuffing is quite forgiving.
* **Washing:** Acrylic yarn is generally washable. If your pumpkins get dirty, you can usually hand wash them gently in cool water with a mild detergent and lay them flat to dry. Always check the yarn label for specific care instructions.
Mistakes That Make This Fail (And How to Avoid Them!)
Even with a simple pattern, a few common pitfalls can trip up beginners. Let’s address them head-on:
* **Tension Too Loose:** If your stitches are too loose, your pumpkin might look saggy and shapeless. Try going down a hook size or two. It’s okay to have a slightly tighter tension for stuffed items.
* **Tension Too Tight:** Conversely, if your stitches are too tight, it can be difficult to get your hook through the stitches, especially during decreases. This can lead to uneven fabric. If you find yourself struggling, try going up a hook size.
* **Not Stuffing Enough:** A lightly stuffed pumpkin will look flat and sad. Don’t be afraid to really pack in that fiberfill! You want a firm, round shape. This is especially important for maintaining the pumpkin’s structure.
* **Forgetting to Join Rounds:** If you accidentally crochet in a spiral without joining at the end of each round, you’ll end up with a long tube instead of a round pumpkin. Always make sure to slip stitch to the first stitch of the round to create that seamless circle.
* **Overstuffing:** While you want firm pumpkins, overstuffing can distort the shape and stretch out your stitches too much, potentially making them look holey. Stuff until you achieve a nice, round, firm shape without any visible gaps in the stitches.
With a little patience and practice, you’ll be whipping up a whole patch of adorable crochet pumpkins in no time. They are such a rewarding project that adds a personal, handmade touch to your autumn decor. Happy crocheting!
Conclusion
See? Creating your own charming crochet pumpkin doesn’t have to be daunting! Even a small touch of handmade coziness can truly brighten your daily space, adding a unique, warm personality that store-bought items just can’t replicate. Ready to dive in? Your very first step today could be as simple as gathering your yarn and hook – that’s it! If pumpkins aren’t quite your jam, imagine a set of crocheted coasters for the living room, or perhaps a vibrant, colorful dishcloth for the kitchen to add a pop of cheer on a budget. We have so many more delightful projects waiting for you. Come explore and let your creativity bloom!