Extra large pegboards are an absolute game-changer for taming craft room chaos! Do you ever feel like your creative space is a beautiful mess, with supplies spilling out of drawers and projects constantly getting nudged aside? I know I’ve been there. Imagine a serene, organized haven where every tool has its place, your inspiration is always within reach, and you can actually find that specific bead or paintbrush without digging for ages. It’s incredibly satisfying to see it all neatly displayed, ready for your next project. The best part? Setting up a substantial pegboard system can often be done over a weekend for under a couple of hundred dollars. In this article, I’ll walk you through how to choose the right size, install it safely, and then share my favorite tips for maximizing its potential to create your dream craft room.
Transform Your Craft Room with the Power of Extra Large Pegboard
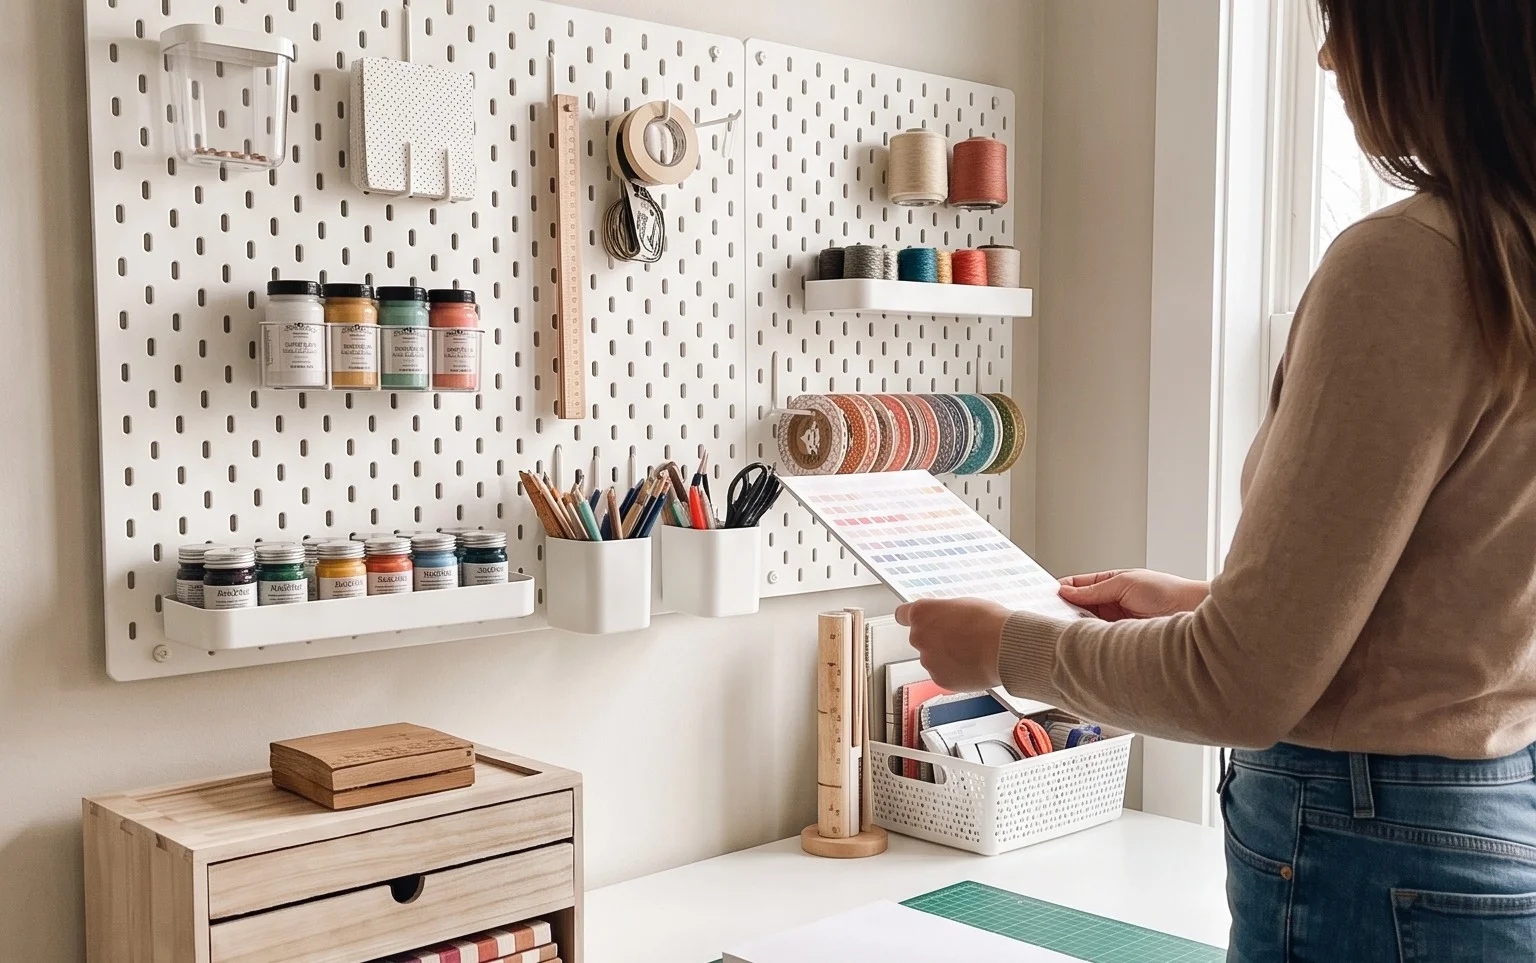
As a fellow crafting enthusiast, I know the struggle. That creative spark can fizzle out when you’re constantly digging through overflowing bins or can’t find that one essential tool. My own craft room was a testament to organized chaos, which is why I decided to embrace the humble pegboard, but with a twist – going BIG. An extra-large pegboard is an absolute game-changer for any craft space, offering a vast canvas for storing and displaying your treasures. Forget those tiny, often overflowing sections of pegboard; we’re talking about a wall-sized solution that can truly redefine your creative zone.
Why Go Extra Large?
The beauty of an extra-large pegboard, typically measuring around 4 feet by 8 feet (1.2m x 2.4m), is its sheer capacity. It allows you to consolidate a huge amount of your crafting supplies in one accessible, visible, and aesthetically pleasing area. Instead of multiple smaller storage units cluttering your floor space, you can reclaim that real estate and have everything at eye level. This means less time spent searching and more time spent creating.
What You’ll Need and Roughly What It Costs
Embarking on this project is more accessible than you might think. Here’s a breakdown of what you’ll need and a realistic idea of the investment.
What You’ll Need:
* One extra-large pegboard (4ft x 8ft is standard). These are typically made of hardboard or metal. Hardboard is more common and affordable.
* Pegboard accessories: This is where the fun begins! You’ll need a variety of hooks, shelves, bins, and holders. Think about your specific craft supplies:
* J-hooks and L-hooks for hanging tools like scissors, rulers, paintbrushes. Aim for at least 50-100 assorted hooks to start.
* Pegboard bins or baskets for smaller items like beads, buttons, embroidery floss, markers. Budget for 10-20 of these in various sizes.
* Small shelves for displaying heavier items or organizing pots of paint or jars. 5-10 shelves should be a good starting point.
* Specialty holders like pliers holders, drill bit organizers, or yarn dispensers if applicable to your craft.
* Mounting hardware:
* For a wall-mounted solution: Ledger board (a piece of wood, e.g., 1×3 or 1×4), screws (appropriate length for your wall studs, typically 2-3 inches), wall anchors (if you can’t hit studs everywhere, though hitting studs is ideal for an 8ft board). You’ll likely need around 10-15 screws.
* For a freestanding unit (no drilling): Two sturdy upright supports (e.g., 2×4 lumber), a base for stability (e.g., plywood or 2x4s forming a rectangular base), screws to assemble the base and attach the uprights.
* Tools:
* Measuring tape
* Level
* Stud finder (essential for wall mounting)
* Drill/driver
* Screwdriver bits
* Pencil
* Saw (if you need to cut the ledger board or lumber for a freestanding unit)
* Optional: Paint or stain if you want to customize the pegboard or its surrounding frame.
Rough Costs:
* Extra-large pegboard (4ft x 8ft hardboard): $30 – $70
* Assorted pegboard hooks and accessories: $50 – $200 (this can vary wildly depending on how many specialized items you buy)
* Mounting hardware (ledger board, screws, anchors): $20 – $40
* Lumber for freestanding unit (if applicable): $40 – $80
So, you’re looking at an investment of roughly $100 to $300, depending on your choices and whether you go wall-mounted or freestanding. This is a one-time cost for a significant organizational upgrade that will pay dividends in your creative workflow.
Measuring and Planning Before You Start
Before you even think about touching a drill, take some time to plan. This is crucial for ensuring your pegboard fits your space and serves your needs effectively.
1. **Assess Your Space:** Where do you envision this pegboard living? Is it a dedicated wall in your craft room, a section of your garage, or a corner of your living room? Measure the available wall space precisely. Note the height and width, and importantly, check for obstructions like windows, doors, light switches, or electrical outlets.
2. **Inventory Your Supplies:** Go through your craft supplies methodically. What do you have the most of? What do you use most frequently? What items are currently causing the biggest clutter issues? Group similar items together. This inventory will guide your purchase of pegboard accessories.
3. **Sketch It Out:** Grab a piece of paper and sketch a rough layout. Imagine your extra-large pegboard and start mentally (or physically) placing your most-used tools and supplies. Where will your paints go? Where will your scissors and rulers hang? This doesn’t have to be perfect, but it gives you a visual anchor.
4. **Consider Accessibility:** Place frequently used items at eye level or within easy reach. Less frequently used items or those that are bulkier can go higher or lower.
The Process: A Step-by-Step Walkthrough
Here’s how I tackled installing my extra-large pegboard, broken down into simple steps.
1. **Prepare the Wall (Wall-Mounted):**
* **Locate Studs:** Use your stud finder to mark the location of wall studs. For an 8ft board, you’ll want to hit as many studs as possible. Aim for studs every 16 or 24 inches. Mark these locations lightly with a pencil.
* **Install the Ledger Board:** Cut a ledger board (e.g., a 1×4 piece of lumber) to the width of your pegboard (4 feet). Position this ledger board on the wall where you want the bottom of your pegboard to sit. Use a level to ensure it’s perfectly horizontal. Screw the ledger board into the wall studs using your long screws. This provides a sturdy support for the bottom of the heavy pegboard.
2. **Position the Pegboard:**
* **Lift and Lean:** With a helper (highly recommended for an 8ft board!), carefully lift the pegboard and lean it against the wall, resting the bottom edge on the ledger board.
* **Mark Mounting Holes:** Once the pegboard is in position and you’re happy with the placement, use your pencil to mark through the pre-drilled holes in the pegboard onto the wall. Mark at least two studs for the top edge and several more along the sides if possible. If you can’t hit a stud for every hole, note where you’ll need to use wall anchors.
3. **Drill Pilot Holes:**
* **For Studs:** Remove the pegboard. Using a drill bit slightly smaller than your screws, drill pilot holes into the wall studs at the marked locations.
* **For Anchors:** If using wall anchors, follow the anchor manufacturer’s instructions for drilling the correct size hole at the marked locations.
4. **Mount the Pegboard:**
* **Secure the Board:** With the pilot holes drilled, lift the pegboard back into position. Align the holes. Drive your screws through the pegboard holes into the pilot holes (and anchors, if used). Start with the top row to ensure the board is securely attached. Tighten all screws firmly, but don’t overtighten, which could strip the holes or crack the pegboard.
5. **Add Accessories:**
* **Start Filling:** Now for the fun part! Begin inserting your hooks, shelves, and bins according to your plan. Start with the most frequently used items and work your way outwards.
**For a Freestanding Unit:**
If drilling isn’t an option, a freestanding unit is a fantastic alternative.
1. **Build the Base:** Construct a sturdy rectangular base using 2×4 lumber and plywood. The base needs to be wide and deep enough to prevent tipping.
2. **Attach Uprights:** Securely attach two uprights (e.g., 2x4s) vertically to the base. Ensure they are parallel and plumb.
3. **Mount the Pegboard:** Screw the pegboard to the uprights. You might need to add cross braces to the back of the uprights for extra stability, especially for an 8ft board.
Adapting for Small Spaces or Rentals
Don’t despair if you have a tiny craft nook or live in a rental where drilling is a no-go!
* **Smaller Pegboard Options:** While we’re talking extra-large, you can still get a fantastic organizational system with a slightly smaller pegboard, like 2ft x 4ft (0.6m x 1.2m), and strategically place it.
* **Freestanding Unit is Key:** For rentals, a freestanding unit is your best friend. You can build a substantial unit that looks great and offers immense storage without making a single hole in the wall. You can even add wheels to a freestanding unit for ultimate flexibility.
* **Command Strips (with Caution):** For lightweight items and smaller pegboard sections, heavy-duty Command strips *might* work, but I wouldn’t recommend them for an entire 4x8ft board due to the weight. Always test the weight capacity and adhere to instructions.
Styling Notes: Making it Look Good
A functional craft space can also be beautiful!
* **Color Palette:** Consider painting or staining your pegboard a color that complements your room. A crisp white, a soft pastel, or even a bold color can add personality. You can also paint the accessories in coordinating colors.
* **Texture Play:** Mix and match different types of accessories. Metal bins offer a sleek look, while fabric bins add a softer texture. Wooden shelves bring warmth.
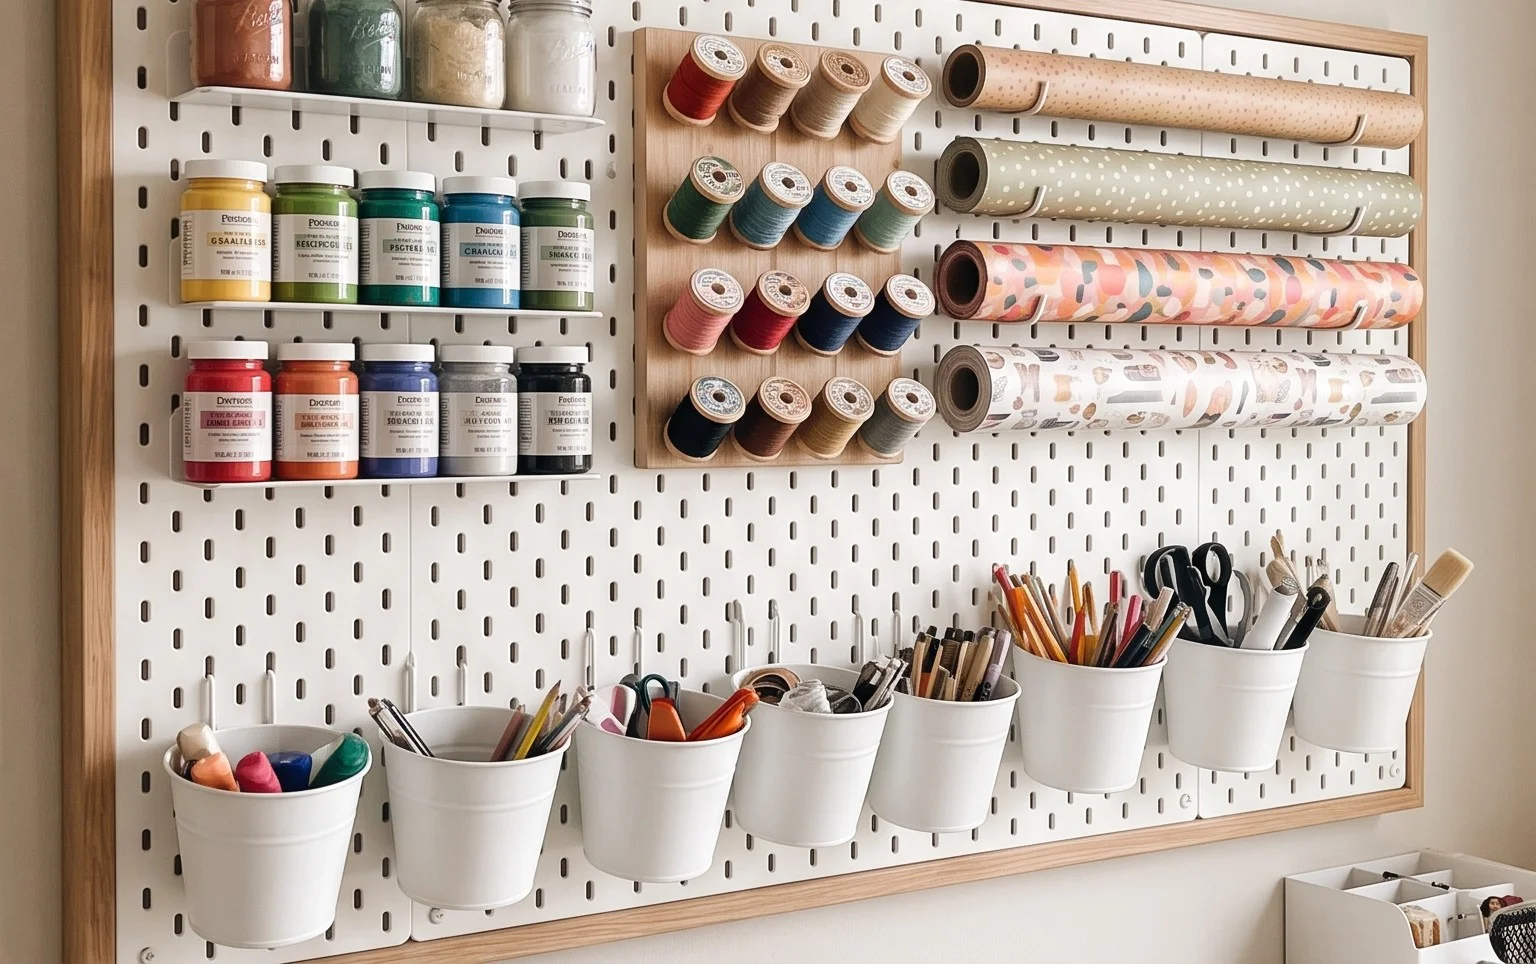
* **Strategic Placement:** Don’t just cram things in. Group similar items together. Place your most visually appealing items (like beautiful yarn skeins or colorful markers) where they can be seen. Utilize shelf space for jars or decorative containers. Hang frequently used tools neatly.
* **Verticality is Your Friend:** Use the full height of the pegboard. Place heavier, bulkier items at the bottom, and lighter, smaller items towards the top.
Keeping it Tidy After Week One
The initial installation is exciting, but maintaining order is the real win.
* **The “One In, One Out” Rule:** When you buy a new craft supply, try to use or put away an existing one. This prevents accumulation.
* **Daily Tidy-Up:** Spend 5-10 minutes at the end of each crafting session putting tools back in their designated spots. This is far easier than tackling a massive mess later.
* **Weekly Review:** Once a week, take a quick look. Are things starting to get cluttered? Are there items that are consistently out of place? Adjust your accessory placement or reorganize as needed.
* **Designated Homes:** Ensure every single item has a “home” on the pegboard. If something doesn’t have a designated spot, it’s likely to become clutter.
Mistakes That Make This Fail
Even with the best intentions, some common pitfalls can derail your pegboard dreams.
* **Not Enough Planning:** This is number one. Jumping in without assessing your space or inventorying your supplies leads to buying the wrong accessories or placing things inefficiently.
* **Underestimating Weight:** Pegboards can hold a surprising amount, but overloading certain hooks or shelves can lead to them bending or pulling out. Be realistic about what each accessory can handle.
* **Poor Mounting:** A pegboard that isn’t securely mounted is a safety hazard. Always ensure you’re using appropriate hardware and hitting studs whenever possible for wall-mounted units.
* **Overcrowding:** While the goal is to store a lot, cramming too many items onto the pegboard defeats the purpose of an organized, visually appealing space. Leave some breathing room.
* **Ignoring Maintenance:** The initial tidy-up is easy. Letting it slide for weeks will result in the same old clutter returning. Consistency is key.
* **Buying Too Many Generic Hooks:** While a good assortment is essential, don’t buy hundreds of the same basic hook if you have specific tools that need specialized holders. Tailor your accessories to your actual needs.
An extra-large pegboard is more than just storage; it’s a statement piece that can revolutionize your craft room. With careful planning and execution, you’ll unlock a world of organized creativity. Happy crafting!
Conclusion
Implementing an extra large pegboard for your craft room organization can truly transform your creative space. Imagine the difference it makes each day to have everything beautifully displayed, easily accessible, and neatly in its place. No more rummaging for that elusive spool of thread or that favorite pair of scissors!
Ready to experience this for yourself? The smallest possible first step is to simply clear one small section of wall. Even just a few hooks and a small shelf can begin to bring order. For a different room or budget, consider a smaller pegboard for a kitchen spice rack or a simple wall-mounted organizer for entryway keys and mail.
We hope this inspires you to declutter and create a more functional, enjoyable space. Don’t hesitate to explore more ideas to bring organization and beauty into every corner of your home!